Easy Christmas Crochet Stars: Free 5-Point Pattern
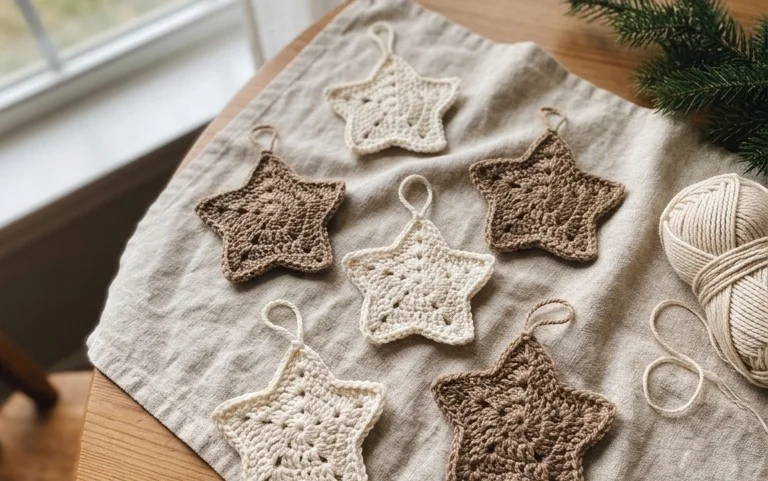
These crisp five-point stars have a clean, geometric shape that catches the light when hung from a pine tree branch. The dense construction comes from a simple technique using cotton yarn and a smaller hook size than usual, which ensures the points stay flat and stiff rather than curling at the edges. Beginners will appreciate how quickly each piece comes together, making them a practical choice for batch production during a busy December weekend. You will master the basic increase and decrease stitches required to form these sharp corners while creating a timeless decoration for your seasonal home collection.
Why You’ll Love This Pattern
The Classic Crochet Storage Basket is a functional household staple that balances structural integrity with a clean, modern aesthetic. By using a double-strand technique with worsted weight cotton yarn, you create a dense fabric that holds its shape even when filled with heavy items like yarn cakes or office supplies. This project requires only basic single crochet stitches worked in continuous rounds, making it an ideal choice for testing your tension and producing a professional-looking result in a single afternoon. It is also an effective way to manage leftover yarn, as the rigid sides mask minor color transitions or varying dye lots.
I finally found a basket pattern that actually stands up on its own without needing a plastic insert. It worked up in about three hours and holds all my crochet hooks perfectly.
— Sarah, home organizer
Pattern Overview & Skill Level
- Skill Level: Beginner
- Approximate Time: 3 to 4 hours
- Construction: Worked in continuous rounds from a flat circular base upward into a vertical tube
- Finished Dimensions: 8 inches in diameter and 6 inches in height
Materials & Supplies Needed
- Yarn: Worsted #4 weight, 100% cotton, approximately 400 yards total. You will hold two strands together throughout the entire project.
- Hook Size: 6.0 mm / J-10 aluminum crochet hook
- Notions: Locking stitch marker, tapestry needle with a large eye, scissors
- Yarn Substitutions: You may use acrylic yarn for a softer feel, though it will be slightly less rigid than cotton. Wool blends are also suitable but will require hand-washing to maintain the basket shape.
Stitch Guide & Abbreviations (US Terms)
- MR = Magic Ring
- ch = Chain
- sc = Single crochet
- inc = Increase (work 2 sc into the same stitch)
- dec = Invisible decrease (insert hook into front loop of next two stitches, yarn over, pull through both, yarn over, pull through remaining two loops)
- sl st = Slip stitch
- st/sts = Stitch/stitches
- BLO = Back loop only (insert hook under the back loop of the stitch only)
Step-by-Step Pattern Instructions
Basket Base
- Rnd 1: Start with MR, work 6 sc into ring. Pull tight to close (6 sts).
- Rnd 2: Inc in each st around (12 sts).
- Rnd 3: [Sc, inc] 6 times (18 sts).
- Rnd 4: [Sc 2, inc] 6 times (24 sts).
- Rnd 5: [Sc 3, inc] 6 times (30 sts).
- Rnd 6: [Sc 4, inc] 6 times (36 sts).
- Rnd 7: [Sc 5, inc] 6 times (42 sts).
- Rnd 8: [Sc 6, inc] 6 times (48 sts).
- Rnd 9: [Sc 7, inc] 6 times (54 sts).
- Rnd 10: [Sc 8, inc] 6 times (60 sts).
Basket Sides
- Rnd 11: Sc in BLO of every st around (60 sts). Working in the back loop creates a sharp transition between the base and the walls.
- Rnds 12-25: Sc in both loops of every st around (60 sts per round).
- Rnd 26: Sl st in each st around to create a clean, sturdy top edge. Fasten off and weave in ends securely.
Care & Washing Instructions
- Spot clean with a damp cloth and mild detergent for minor spills.
- Hand wash in cool water if the entire basket becomes soiled, then reshape while damp.
- Lay flat on a towel in a well-ventilated area to air dry completely.
Pro Tips & Common Mistakes to Avoid
- Use a stitch marker at the start of every round. Because this project is worked in continuous spirals rather than joined rounds, it is easy to lose count of your placement without a marker.
- Maintain consistent tension. Since you are holding two strands of yarn together, pull slightly tighter than usual to ensure the fabric stays dense and the gaps between stitches remain minimal.
- Weave in your ends by traveling through the inside stitches of the base or the interior wall. This hides the tail and adds a small amount of extra thickness to the structure.
- Adjusting the size is straightforward. To make the basket larger, add more increase rounds at the beginning; to make it taller, simply continue repeating the sc round until the desired height is reached, keeping in mind that you will need additional yardage.
Frequently Asked Questions
Can I use a different yarn weight for this project?
Using a lighter weight yarn will result in a smaller, thinner basket. If you choose to use a thinner yarn, consider holding three or four strands together to maintain the structural rigidity required for a storage item.
Is this pattern suitable for someone who just started crocheting?
Yes, this is an excellent pattern for beginners. It focuses on the fundamental single crochet stitch and the concept of working in rounds, which are essential skills for almost all 3D crochet projects.
Do I need to block the finished basket?
You do not strictly need to wet block this item. If the sides feel soft or floppy, you can steam the basket lightly while pulling the sides into a perfect cylindrical shape, which will help the cotton fibers set into place.
May I sell the baskets I make from this pattern?
You are welcome to sell your finished handmade items. Please ensure you credit the design and use your own photographs when listing your products online.
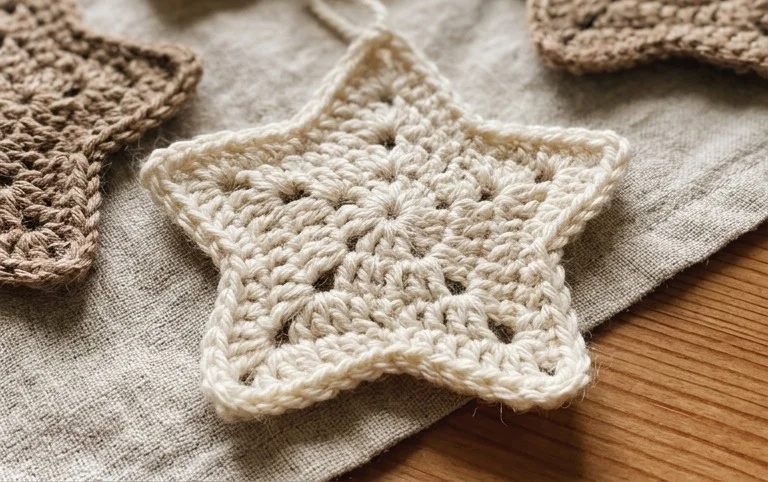
Displaying these handmade ornaments on your holiday tree adds a thoughtful, personal touch to your seasonal decor that feels both grounded and classic. You might consider using a metallic thread held alongside your main yarn for a subtle shimmer or crafting them in various sizes to create a varied display for your windows. Please tag your finished ornaments online if you share them with friends or family. You can find more free ornament projects and seasonal tutorials on the main blog page to keep your hooks busy throughout the winter season.