Easy Crochet Puff Sheep: Free Pattern & Step-by-Step Guide
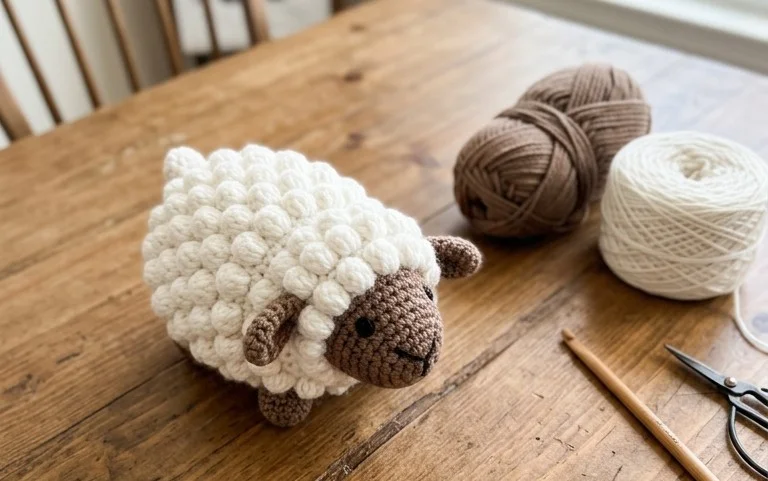
Imagine a tiny, plush companion that fits perfectly in your palm, boasting a whimsical, cloud-like texture that feels incredibly soft to the touch. These adorable woolen friends are a joy to create, making them an ideal project for beginners eager to master the charming bobble stitch or for experienced crafters needing a quick, heartwarming gift idea. Whether you want to brighten your desk or craft a sweet nursery accent, assembling these textured cuties is deeply rewarding. You will soon master the art of creating those signature puffy loops, turning simple yarn into irresistible characters full of personality.
Why Crocheters Love It
This pattern is a fan-favorite for several compelling reasons. First, it is an exceptionally quick project, making it ideal for when you need a last-minute handmade gift or a satisfying “instant gratification” make. Second, it is a masterclass in the magic ring technique, perfect for beginners looking to level up their amigurumi skills. Third, the repetitive nature of the rounds makes this a meditative, travel-friendly project that fits easily into any craft bag. Finally, its compact size means you can use up those small remnants of worsted weight yarn sitting in your scrap bin.
I managed to whip up three of these in a single afternoon for my daughter’s classroom party. The pattern is so well-written and easy to follow that I didn’t even have to look at the instructions after the first one.
— Sarah, amigurumi enthusiast
Pattern Overview & Skill Level
- Skill Level: Beginner
- Approximate Time: 45–60 minutes
- Construction: Worked in continuous rounds from the top down, with increases and decreases for shaping, followed by stuffing and closing.
- Finished Dimensions: Approximately 3 inches tall by 2.5 inches wide.
Materials & Supplies Needed
- Yarn: Worsted weight (#4), 100% cotton or acrylic blend, approximately 30 yards.
- Hook Size: 3.5 mm (E-4) for a tight, plush-free fabric.
- Notions: Tapestry needle, locking stitch marker, fiberfill stuffing, 6mm safety eyes.
- Yarn Substitutions: DK weight yarn can be used with a 3.0 mm hook for a smaller, delicate finish, while bulky yarn and a 5.0 mm hook will result in a larger, cuddlier version. Note that changing weight will require more or less yardage respectively.
Stitch Guide & Abbreviations (US Terms)
- MR: Magic Ring
- ch: chain
- sc: single crochet
- inc: increase (work 2 sc in the same stitch)
- dec: decrease (invisible decrease: insert hook into front loops of next 2 sts, yarn over, pull through, yarn over, pull through)
- st/sts: stitch/stitches
- sl st: slip stitch
- FO: fasten off
Step-by-Step Pattern Instructions
Body
- Rnd 1: Start 6 sc in MR. (6 sts)
- Rnd 2: inc in each st around. (12 sts)
- Rnd 3: sc 1, inc repeat 6 times. (18 sts)
- Rnd 4: sc 2, inc repeat 6 times. (24 sts)
- Rnd 5–9: sc in each st around. (24 sts)
- Rnd 10: sc 2, dec repeat 6 times. (18 sts)
- Insert safety eyes between Rnds 7 and 8, approximately 4 stitches apart. Begin stuffing firmly.
- Rnd 11: sc 1, dec repeat 6 times. (12 sts)
- Rnd 12: dec repeat 6 times. (6 sts)
Finishing
Cut yarn leaving a 6-inch tail. Use a tapestry needle to weave the tail through the front loops of the remaining 6 stitches. Pull tight to close the hole securely and bury the end inside the body of the project. Trim excess yarn.
Care & Washing Instructions
- Hand wash in cool water using a gentle detergent to maintain the shape of the stuffing.
- Lay flat on a clean towel in a well-ventilated area to dry, avoiding direct sunlight.
- Gently reshape the piece with your hands while damp to restore its original form.
Pro Tips & Common Mistakes to Avoid
- Maintain Tension: Use a hook size smaller than the yarn label recommends to keep your stitches tight, ensuring the fiberfill stuffing does not show through.
- Use Stitch Markers: Because this is worked in continuous rounds, always place a marker in the first stitch of every round to keep your count accurate.
- Weaving Ends: For an invisible finish, always weave your ends back and forth through the inner stuffing rather than across the surface of the stitches.
- Size Adjustments: If you want a larger toy, you can add extra increase rounds (e.g., sc 3, inc), but keep in mind this will exponentially increase your yarn consumption and require more stuffing.
Frequently Asked Questions
Can I use a different yarn weight for this pattern?
Yes! You can use any yarn weight as long as you match your hook size to create a tight fabric so the stuffing won’t poke through. Remember that changing the weight will significantly alter the finished size.
Is this project suitable for a total beginner?
Absolutely. It focuses on the most essential amigurumi techniques (MR, sc, inc, dec) without complex color changes or sewing of limbs, making it a perfect first project.
How do I make the toy larger?
To scale up, increase the diameter of the base by adding more rounds of increases before the even rounds. Note that you will need to add corresponding decrease rounds later to close the piece.
Am I allowed to sell items made from this pattern?
You are welcome to sell finished items created from this pattern, provided you credit me as the designer. Please do not redistribute or sell the pattern instructions themselves.
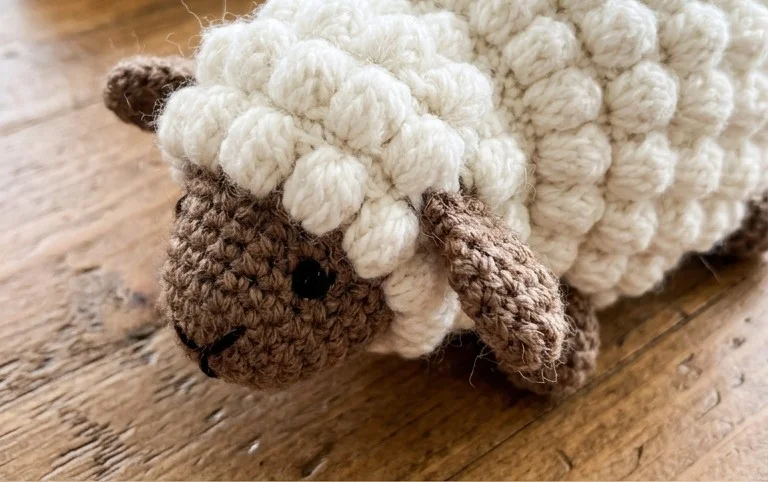
Your finished little woolly companions look absolutely adorable and are sure to bring a smile to anyone who sees them! For a fun twist, try working yours up in a vibrant variegated yarn or even a chunky weight for a cuddlier, oversized version. Once you wrap up your project, I would love to see your creations, so please share your photos on Pinterest or Instagram with our community tag. Before you go, feel free to browse our archives for more cozy, free patterns.