Easy Crochet Cow Pattern: Free Step-by-Step PDF
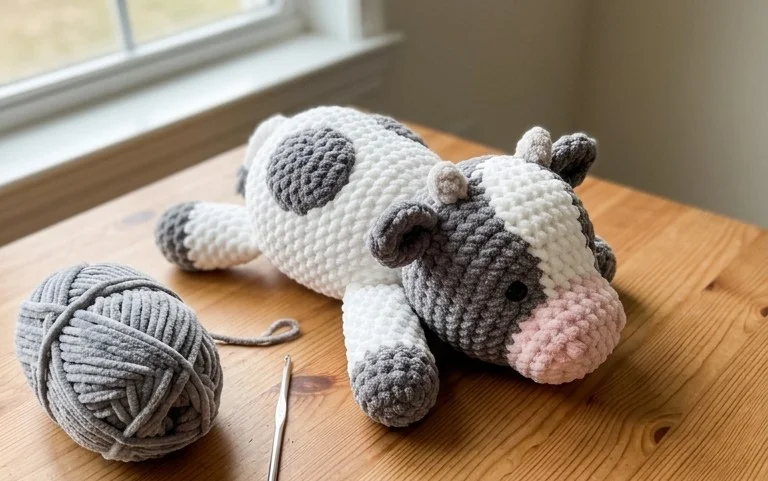
Soft to the touch and small enough to fit in the palm of your hand, this stuffed animal is a gentle introduction to working in the round. You will find that the squishy, dense texture of single crochet stitches creates a durable toy that holds its shape without looking floppy. Beginners appreciate how the simple body construction allows for quick progress, while those who make gifts enjoy the fast turnaround time. By focusing on consistent tension, you master the invisible decrease technique and learn how to shape basic amigurumi forms effectively. It is a rewarding project for any stash-busting session.
Why Crocheters Love It
This beginner-friendly project is the perfect introduction to the world of amigurumi. By focusing on a simple shape, you learn the foundational mechanics of continuous rounds without the stress of complex color changes or difficult shaping. The project works up quickly in just an hour or two, making it an ideal choice for last-minute handmade gifts or stocking stuffers. Its small scale also means you can easily pull from your existing stash of leftover worsted-weight yarn. The repetitive, meditative nature of the single crochet stitches provides a relaxing experience that helps you build consistent tension.
I managed to finish this project in one sitting while watching a movie. The instructions were easy to follow and my finished piece turned out exactly like the photos.
— Sarah, hobbyist crafter
Pattern Overview & Skill Level
- Skill Level: Beginner
- Approximate Time: 1.5 – 2 hours
- Construction: Worked in continuous rounds from the base upwards, finished with a simple gather-close technique.
- Finished Dimensions: Approximately 3 inches tall by 2.5 inches wide.
Materials & Supplies Needed
- Yarn: Worsted #4 weight, 100% acrylic or cotton, approximately 30 yards per unit.
- Hook Size: 3.5 mm / E-4 to ensure tight stitches that prevent stuffing from showing through.
- Notions: Tapestry needle for weaving ends, stitch markers to track round starts, polyester fiberfill stuffing, and scissors.
- Safe Yarn Substitutions: You can use DK weight yarn with a 3.0 mm hook for a smaller, more delicate version, or bulky weight yarn with a 5.0 mm hook for a larger, plush-style finish. Note that changing yarn weight will significantly alter the final size and require more or less stuffing accordingly.
Stitch Guide & Abbreviations (US Terms)
- MR: Magic Ring. Used to create a closed, adjustable starting loop.
- ch: Chain.
- sc: Single crochet. Insert hook, yarn over, pull up a loop, yarn over, pull through two loops.
- inc: Increase. Work 2 sc in the same stitch to add a stitch.
- dec: Decrease (invisible decrease preferred). Insert hook into the front loop of the next two stitches, yarn over, pull through, yarn over, pull through both loops on hook.
- sl st: Slip stitch.
- st/sts: Stitch/stitches.
Step-by-Step Pattern Instructions
Main Body
- Rnd 1: Work 6 sc into a magic ring (6 sts).
- Rnd 2: 2 sc in each st around (12 sts).
- Rnd 3: (1 sc in next st, inc) repeat 6 times (18 sts).
- Rnd 4: (1 sc in next 2 sts, inc) repeat 6 times (24 sts).
- Rnd 5-10: Sc in each st around (24 sts).
- Rnd 11: (1 sc in next 2 sts, dec) repeat 6 times (18 sts).
- Rnd 12: (1 sc in next st, dec) repeat 6 times (12 sts). Stuff the body firmly at this stage.
- Rnd 13: Dec 6 times (6 sts).
Finishing
Cut the yarn leaving a 6-inch tail. Thread the tail onto your tapestry needle. Weave the yarn through the front loops of the remaining 6 stitches and pull tight to close the opening securely. Secure the yarn with a knot and bury the remaining tail inside the body of the piece.
Care & Washing Instructions
- Hand wash in cool water using a gentle soap to protect the fiber structure.
- Lay the piece flat on a towel to air dry, turning it occasionally to ensure even moisture evaporation.
- If the item becomes misshapen, gently roll it between your palms to restore its original round profile.
Pro Tips & Common Mistakes to Avoid
Maintaining consistent tension is the key to preventing “gaps” in your fabric where the white stuffing might show through. If your stitches feel loose, try dropping down one full hook size from the recommendation on your yarn label. Always place a stitch marker in the first stitch of every round to keep your count accurate; because amigurumi is worked in continuous spirals, it is very easy to lose your place without one. When weaving in your ends, always work through the inside of the piece so that the tail remains completely hidden from view. To adjust the size, add more rounds to the middle section of the body, but remember that this will increase the total yardage needed for the project.
Frequently Asked Questions
Can I use a different yarn fiber for this pattern?
Yes, cotton yarn works beautifully and creates a firmer, more defined stitch, while acrylic is softer and more forgiving for beginners.
How do I know if I am stuffing the piece enough?
The piece should feel firm and hold its shape when squeezed gently. If you see stuffing through the gaps, you have likely overstuffed or your tension is too loose.
Is this pattern suitable for complete beginners?
This pattern is designed for those who know the basic single crochet stitch and are ready to practice working in the round.
Can I sell items made from this pattern?
You are welcome to sell finished items created from this pattern, provided you credit the original design and use your own photographs for your listings.
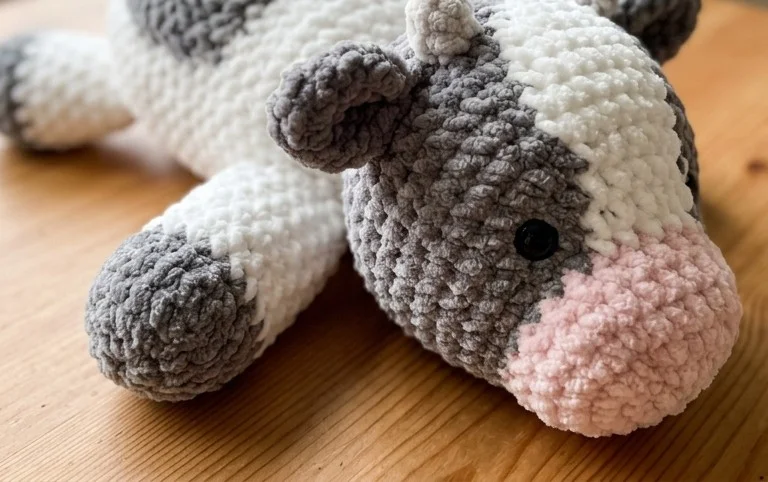
Watching your stitches come together into a finished friend is a highlight of the crafting process. You might experiment with variegated yarn for a whimsical spotted look or switch to velvet yarn for a larger, huggable size that feels like a pillow. Please upload a photo of your creation to your favorite social media site to show off your work. Browse the rest of the blog for more free patterns to fill your afternoon. Each session at the hook helps you improve your overall stitch quality.